A very common scenario in a MVC application is to Submit a form and show a success page along with some information about the submitted data. Now when we submit the form and show the success page, we lose the request params that were available during submitting the form. So we are not able to show those on the new page that we redirected to.
Spring MVC Flash Attributes provide a way to store those attributes that are required to be shown on the next page at a redirect on a Post/Redirect/Get.
Spring MVC uses
FlashMapand
FlashMapManager to support Flash Attributes.
FlashMapis used to hold flash attributes while
FlashMapManageris used to store, retrieve, and manage FlashMap instances.
Each request in Spring MVC has a input FlashMap that stores the previous request attributes and a output FlashMap that carries the current request attributes to next request.
If you are working with annotated controller, then you need not worry about flash map.An argument with type RedirectAttributes is used to handle the Flash Attributes. Flash attributes added via RedirectAttributes are automatically propagated to the output FlashMap. Similarly, after the redirect, attributes from the input FlashMap are automatically added to the Model of the controller serving the target URL
Example: Spring MVC Flash Attributes Using RedirectAttributes
1. Spring Dispactcher Servlet
|
1 2 3 4 5 6 7 8 9 10 11 12 13 14 15 16 17 18 19 20 21 22 23 24 25 26 |
<beans xmlns="http://www.springframework.org/schema/beans" xmlns:context="http://www.springframework.org/schema/context" xmlns:xsi="http://www.w3.org/2001/XMLSchema-instance" xmlns:mvc="http://www.springframework.org/schema/mvc" xsi:schemaLocation="http://www.springframework.org/schema/beans http://www.springframework.org/schema/beans/spring-beans-3.0.xsd http://www.springframework.org/schema/context http://www.springframework.org/schema/context/spring-context-3.0.xsd http://www.springframework.org/schema/mvc http://www.springframework.org/schema/mvc/spring-mvc-3.0.xsd"> <context:component-scan base-package="com.kscodes.sampleproject" /> <bean class="org.springframework.web.servlet.view.InternalResourceViewResolver"> <property name="prefix"> <value>/WEB-INF/jsp/</value> </property> <property name="suffix"> <value>.jsp</value> </property> </bean> <mvc:annotation-driven /> </beans> |
2. Create a Employee Object
|
1 2 3 4 5 6 7 8 9 10 11 12 13 14 15 16 17 18 19 20 21 22 23 24 25 26 27 28 29 30 31 32 33 34 35 |
package com.kscodes.sampleproject.model; public class Employee { private String firstName; private String lastName; private String department; public String getFirstName() { return firstName; } public void setFirstName(String firstName) { this.firstName = firstName; } public String getLastName() { return lastName; } public void setLastName(String lastName) { this.lastName = lastName; } public String getDepartment() { return department; } public void setDepartment(String department) { this.department = department; } } |
3. Create a form to get the employee details
|
1 2 3 4 5 6 7 8 9 10 11 12 13 14 15 16 17 18 19 20 21 22 23 24 25 26 27 28 29 30 31 32 33 |
<%@taglib uri="http://www.springframework.org/tags/form" prefix="form"%> <html> <head> <title>Spring MVC - Flash Attributes</title> </head> <body> <h2>Add Employee</h2> <form:form method="post" action="addEmployee" commandName="employee"> <table> <tr> <td>First Name</td> <td><input type="text" name="firstName"/></td> </tr> <tr> <td>Last Name</td> <td><input type="text" name="lastName"/></td> </tr> <tr> <td>Department Name</td> <td><input type="text" name="department"/></td> </tr> <tr> <td colspan="2"><input type="submit" value="Submit" /></td> </tr> </table> </form:form> </body> </html> |
4. Create a Controller
In the Controller we will first create a ModelAndView to show the Employee Form. We use a command-employee here.
Once the form is submitted we go to the addEmployee() method. Here we get the details filled on the form. In this method we use the
RedirectAttributes to store the flash attributes. Once we store the attributes we will show the welcome page. In the showEmployee() method we get the flash attributes using the
@ModelAttribute
|
1 2 3 4 5 6 7 8 9 10 11 12 13 14 15 16 17 18 19 20 21 22 23 24 25 26 27 28 29 30 31 32 33 34 35 36 37 38 39 |
package com.kscodes.sampleproject.controller; import org.springframework.stereotype.Controller; import org.springframework.web.bind.annotation.ModelAttribute; import org.springframework.web.bind.annotation.RequestMapping; import org.springframework.web.bind.annotation.RequestMethod; import org.springframework.web.servlet.ModelAndView; import org.springframework.web.servlet.mvc.support.RedirectAttributes; import com.kscodes.sampleproject.model.Employee; @Controller public class EmployeeController { @RequestMapping(value = "/employeeForm") public ModelAndView employeeForm() { return new ModelAndView("employeeForm", "employee", new Employee()); } @RequestMapping(value = "/addEmployee", method = RequestMethod.POST) public String addEmployee(@ModelAttribute("employee") Employee employee, final RedirectAttributes redirectAttributes) { redirectAttributes.addFlashAttribute("firstName", employee.getFirstName()); redirectAttributes.addFlashAttribute("lastName", employee.getLastName()); return "redirect:showEmployee"; } @RequestMapping(value = "/showEmployee") public String showEmployee(@ModelAttribute("firstName") String firstName, @ModelAttribute("lastName") String lastName) { return "welcome"; } } |
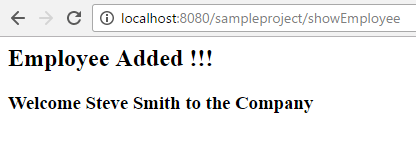
5. Create a welcome page to show the Flash Attributes
On the welcome page we will show the firstName and lastName that we stored as flash attributes.
|
1 2 3 4 5 6 7 8 9 10 11 12 13 |
<%@taglib uri="http://www.springframework.org/tags/form" prefix="form"%> <%@ taglib prefix="c" uri="http://java.sun.com/jsp/jstl/core"%> <html> <head> <title>Spring MVC - Flash Attributes</title> </head> <body> <h2>Employee Added !!!</h2> <h3>Welcome ${firstName} ${lastName} to the Company</h3> </body> </html> |
6. Output