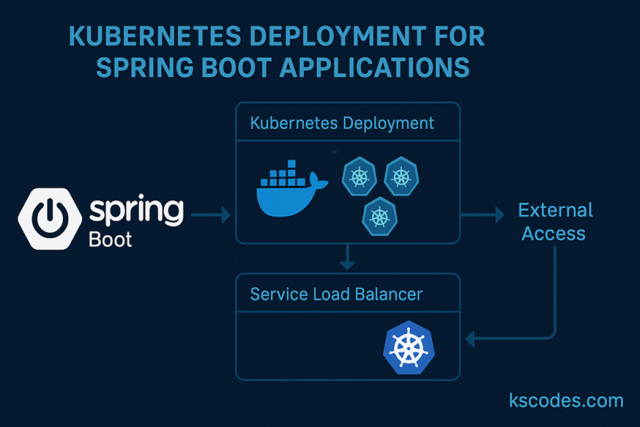
Deploying microservices on Kubernetes has become the de facto standard for cloud-native applications. In this post, you’ll learn Kubernetes deployment on Spring Boot using manifests for Deployment, Service, and health probes.
This guide walks through containerizing your app, writing YAML files, and running it locally with Minikube or any K8s cluster.
🧰 Prerequisites
To follow along, make sure you have:
- Docker installed
- Kubernetes cluster (Minikube or cloud provider)
kubectlCLIspringboot-docker-appimage (from earlier post)

📦 Sample Spring Boot Application
Let’s use the same sample app in package:com.kscodes.springboot.containers
|
1 2 3 4 5 6 7 8 9 10 11 12 13 14 15 |
package com.kscodes.springboot.containers; import org.springframework.web.bind.annotation.GetMapping; import org.springframework.web.bind.annotation.RestController; @RestController public class HelloController { @GetMapping("/") public String hello() { return "Hello from Kubernetes Spring Boot!"; } } |
Build your Docker image:
|
1 2 |
docker build -t kscodes/springboot-k8s-app . |
Push to Docker Hub (or private registry):
|
1 2 |
docker push kscodes/springboot-k8s-app |
🔧 Step 1: Kubernetes Deployment on Spring Boot – YAML
Create a file named deployment.yaml:
|
1 2 3 4 5 6 7 8 9 10 11 12 13 14 15 16 17 18 19 20 21 22 23 24 25 26 27 28 29 30 31 32 33 34 35 36 |
apiVersion: apps/v1 kind: Deployment metadata: name: springboot-app labels: app: springboot spec: replicas: 2 selector: matchLabels: app: springboot template: metadata: labels: app: springboot spec: containers: - name: springboot image: kscodes/springboot-k8s-app ports: - containerPort: 8080 livenessProbe: httpGet: path: / port: 8080 initialDelaySeconds: 10 periodSeconds: 5 readinessProbe: httpGet: path: / port: 8080 initialDelaySeconds: 5 periodSeconds: 3 |
🌐 Step 2: Service YAML
Expose the app internally or externally. Create a file named service.yaml:
|
1 2 3 4 5 6 7 8 9 10 11 12 13 |
apiVersion: v1 kind: Service metadata: name: springboot-service spec: selector: app: springboot ports: - protocol: TCP port: 80 targetPort: 8080 type: LoadBalancer |
If you’re using Minikube, it will expose via NodePort or tunnel:
|
1 2 |
minikube service springboot-service |
📦 Step 3: Apply the YAMLs
|
1 2 3 4 5 |
kubectl apply -f deployment.yaml kubectl apply -f service.yaml |
Check the pods and service:
|
1 2 3 4 5 |
kubectl get pods kubectl get service |
📡 Accessing the App
If you’re on Minikube:
|
1 2 3 4 |
minikube service springboot-service |
If you’re using a cloud cluster (GKE, EKS, AKS), it will create an external IP in the load balancer section.
🔄 Rolling Update Example
Want to roll out a new version?
|
1 2 3 4 5 6 |
# Modify image in deployment.yaml: image: kscodes/springboot-k8s-app:v2 kubectl apply -f deployment.yaml kubectl rollout status deployment/springboot-app |
To undo:
|
1 2 |
kubectl rollout undo deployment/springboot-app |
🔥 Probes Explained
- Liveness Probe: Kills the pod if it’s unhealthy
- Readiness Probe: Routes traffic only when app is ready
These make Spring Boot services more resilient and reliable on Kubernetes.
📁 Full File Structure
|
1 2 3 4 5 6 7 8 9 |
springboot-k8s/ ├── Dockerfile ├── deployment.yaml ├── service.yaml ├── src/ └── pom.xml |
🛡️ Best Practices for K8s + Spring Boot
| Tip | Why It Helps |
|---|---|
| Use health probes | Improves uptime and traffic control |
| Externalize configs with ConfigMap | Keeps images clean |
Use imagePullPolicy: IfNotPresent | Faster redeploys in dev environments |
| Tag Docker images semantically | Avoid “latest” in prod |
📘 Summary
In this post, you deployed a Spring Boot app on Kubernetes using Docker and YAML manifests. You learned how to define a Deployment, expose it with a Service, and secure your app using liveness/readiness probes. This is the foundation for moving into advanced topics like ConfigMaps, Secrets, and Helm charts.